
Meet the team page design in Squarespace.
If you are wanting to create a smart 'meet the team' page for your squarespace website, I am here to show how I create mine that are nicely laid out and look presentable and professional all at the same time with no technical or coding skills. There are many sites nowadays that have very flashy and eye catching team pages that look great but some of these require some skills that may be out of your grasp. Not too worry though! You can still create a stunning team page without it. This short tutorial is intended to help those of you who are maybe new to designing websites, have a lack of coding knowledge or are not comfortable when it comes to how to lay out a team page in the squarespace editor.
I have designed a few meet the team pages for clients and they have all had very good feedback in regards to the way they looked visually and how they presented the business. I have constructed this short tutorial step by step so it is easy to follow and understand (hopefully).
step 1. Minimum content Requirements for a team page.
The minimum content requirements I would recommend for a meet the team page would be a 'name' 'title' and some sort of a 'description' about each person presented on the page. A lot of websites as I am sure you are aware of miss the descriptive part out but I think this really helps the viewer understand what that person is about and forms a stronger bond between the viewer and them. I think it especially helps when potential or current clients view the page, often times they would like to know what type of person they are doing business with and having this small bio about them will help gain a better understanding about that person and gain more trust.
Ultimately the type of content you choose to include for your team is entirely up to you and feel free to be creative! Some businesses like to include what each persons future goals are to what their likes and dislikes are to engage the viewer more. I suggest you having a look at a few sites in your industry for inspiration and perhaps there may be a pattern that your industry follows in regards to what they include when presenting their team profiles.
The second part of the content would be a photo of the individuals. I recommend hiring a photographer taking some professional headshots to really showcase a professional image about your brand and business but if this isn't an option a high quality image of each person will work great. Some employees may not want their photo on the site or feel uncomfortable doing a photo shoot so therefore some businesses use catoon characters or figurines to stand in place. If this is the case for you, be creative and have a of bit fun if your businesses brand potrays this already. Here are some examples:


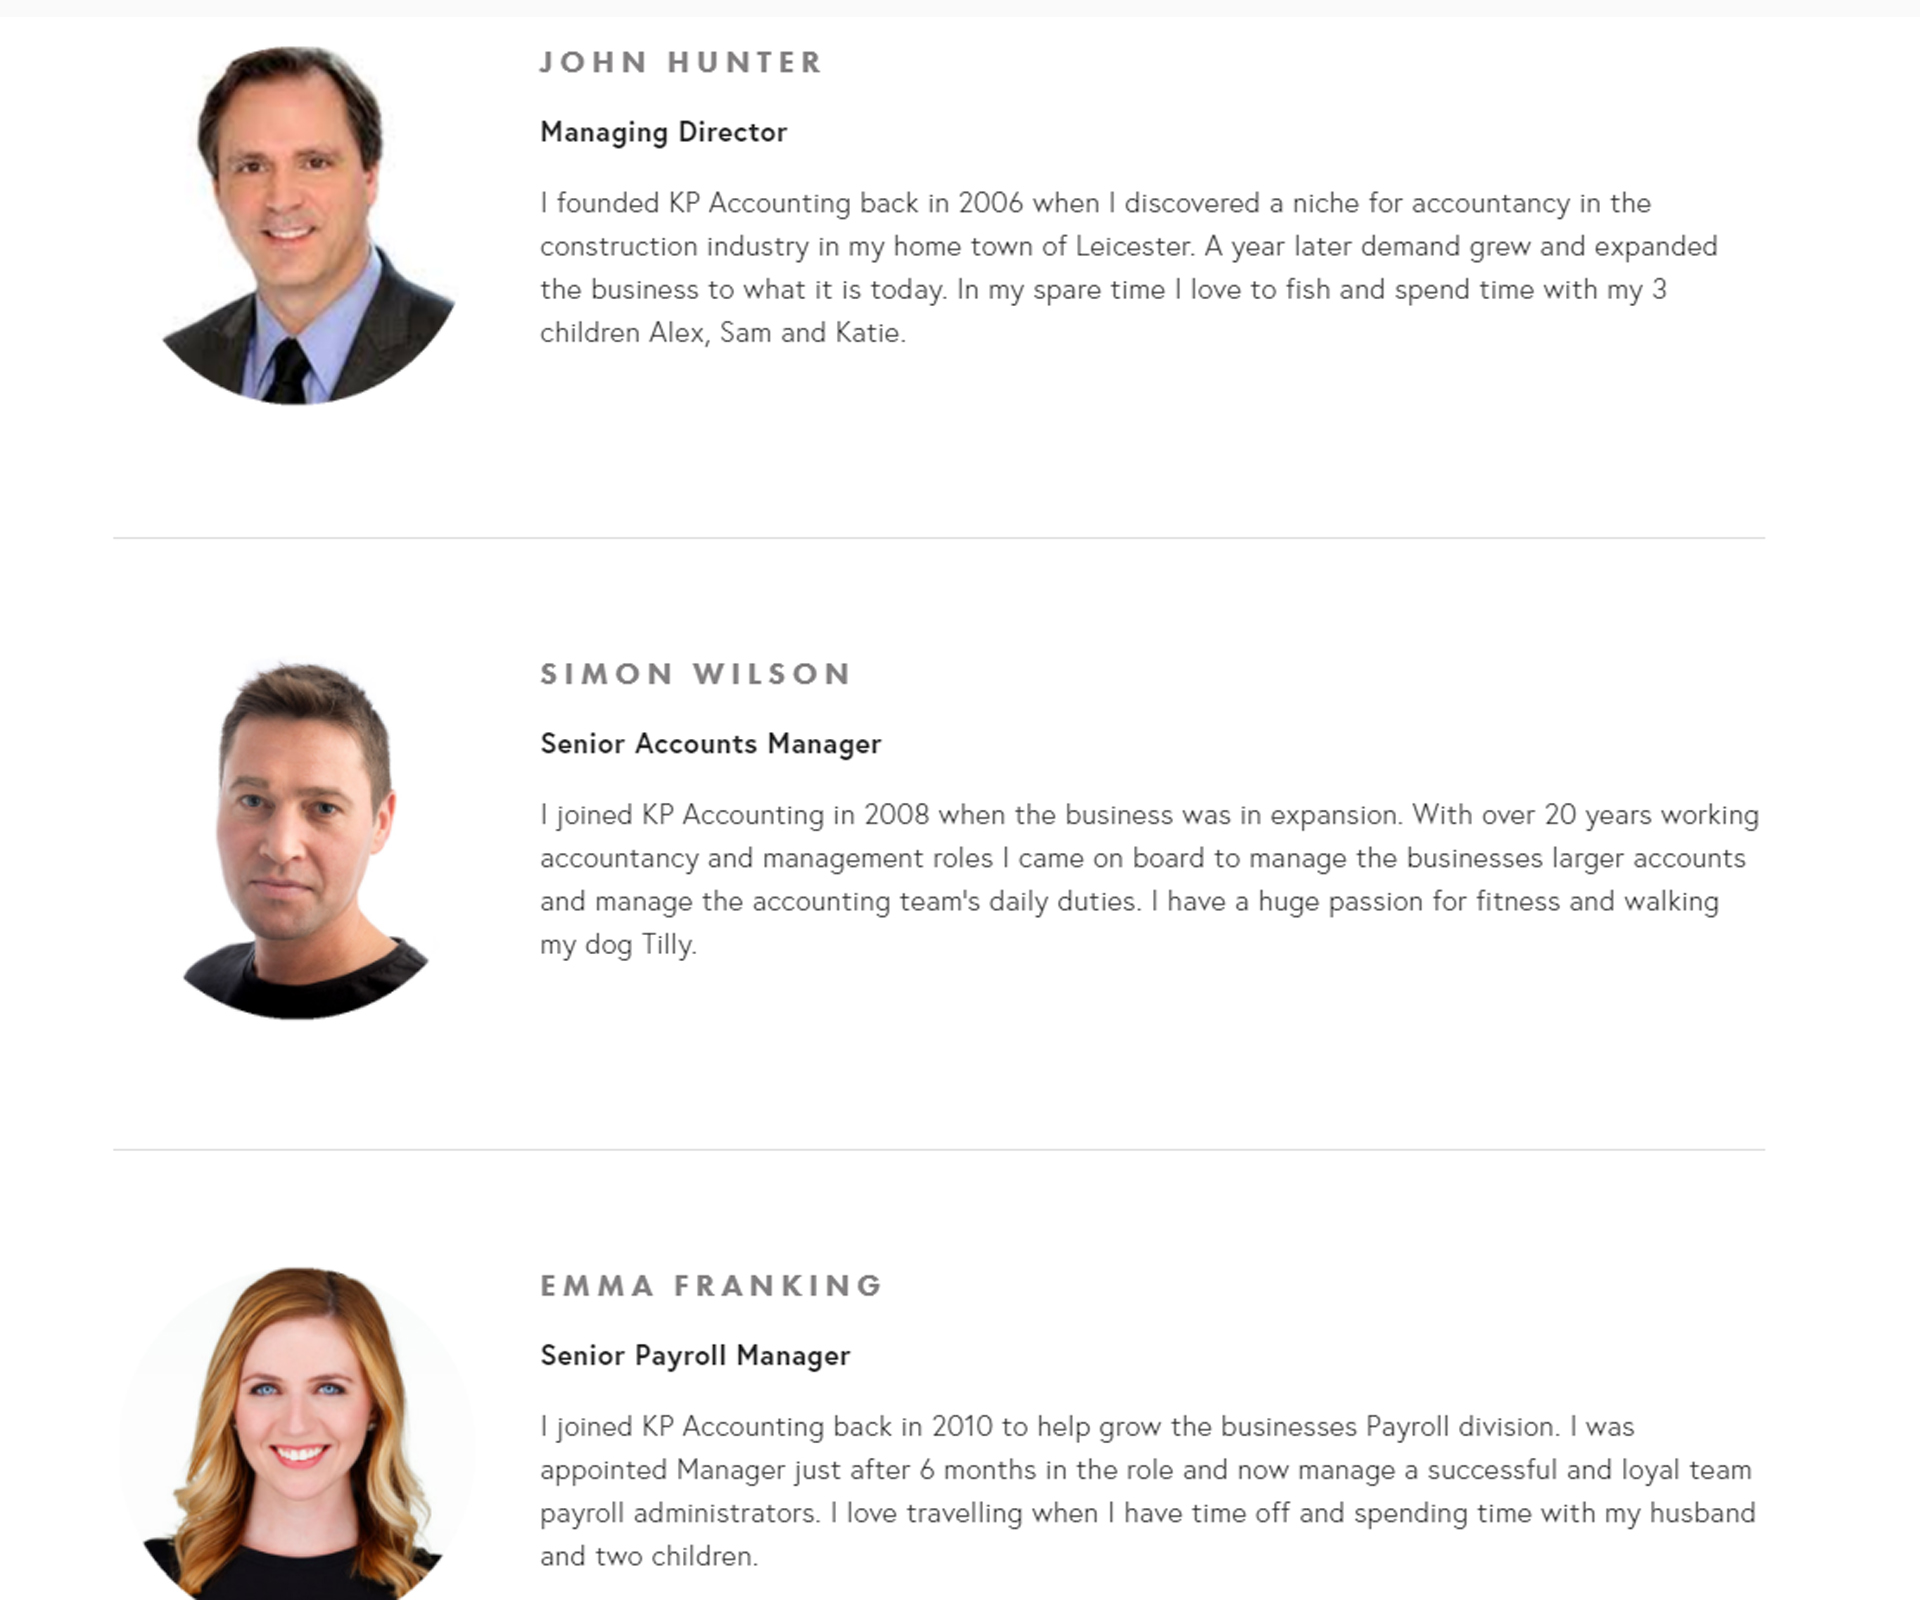
Step 2. Layout & design of the meet the team page.
Below I have I constructed a generic team page and layout that I use for all my team pages that can be used for any industry and is all you really need to create a professional team page. I have included their 'name' 'title' and a short bio 'about' each person. In the bio I usually suggest some info about when they started at the company and what their daily duties are and a few sentences about what they like to do in their spare time or any hobbies they might have. This is all the info a viewer would need to gain a better understanding of that person and will help gain their trust.
There are only three elements when it comes to the layout of the page making it easy and less time consuming. Let's start with the first one. The first is the position of the photo, second is the position of the text and third the position of the line that separates each individual profile.
The first part you would need to do when creating the page is to upload the headshots or photos to the page, do one at a time so don't upload all the photo's at once. Once you have uploaded a photo of 'John Hunter' for example you will then insert a 'Text' box. In the text box you will be entering their 'name' 'title' and short 'description' as previously mentioned. When typing the text make sure the text is aligned to the left. Starting with the name I suggest using one of your headers so it is larger and stands out like in the picture below. Have a play around with your headers and even feel free to go into the 'Style Editor' and change the headers design to suit your needs.
You want all three to have a slightly different contrast in size and colour so they all stand out. I normally make the name the biggest followed by the title and description sort of like a pyramid. Underneath the name insert the persons title, same as the picture. Now insert your bio for the individual, in most cases I use the standard 'Normal' text for the bio that is used for the rest of your site. Now that you have inserted the text drag and drop the text to the right of the persons image. Once complete you will more than likely need to do a bit of resizing. To do this simply drag the text area to the left which will shrink the image. Do this until you think it is of good proportion and size. IMPORTANT: Make sure to check all three mobile, tablet and desktop view to ensure it looks good on all devices. Third step is to now add the line that separates each person. Simply hover your mouse to the bottom left of the persons image and and wait for the 'teardrop' icon to appear. Ensure that when the teardrop icon appears it is spanning across the full length of the site. Click on this and insert 'Line'. Your are complete! It should hopefully look like something in the below picture, if it does congrats! Now rinse and repeat.
I hope you found this squarespace guide useful and easy to follow. If you have any questions or want to get in touch feel free to contact me at: home@clickpeach.co.uk I am also a professional squarespace designer so if you need help with your site or need advice I am always happy to help!
Thanks for reading!
Ashley